部署个人 chatgpt-telegram-bot
·
2 min read
ChatGPT使用太不稳定了,为了避免不可用时耽误事,搭建个私人TG Bot备用。调研发现chatgpt-telegram-bot不错,因此选择服务来搭建
搭建步骤
TG下访问@BotFather创建Bot
TG下访问@useridinfobot,获取个人账号UserID,注意不是名字
选择HK或者境外服务器,拉取镜像
docker pull n3d1117/chatgpt-telegram-bot:latest创建.env文件,配置环境变量,参考https://github.com/n3d1117/chatgpt-telegram-bot/blob/main/.env.example
主要是这四个配置
# Your OpenAI API key
OPENAI_API_KEY=XXX

# Your Telegram bot token obtained using @BotFather
TELEGRAM_BOT_TOKEN=XXX

# Telegram user ID of admins, or - to assign no admin
ADMIN_USER_IDS=ADMIN_1_USER_ID,ADMIN_2_USER_ID

# Comma separated list of telegram user IDs, or * to allow all
ALLOWED_TELEGRAM_USER_IDS=USER_ID_1,USER_ID_2
启动容器
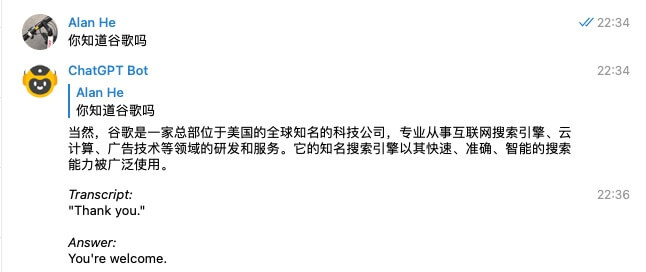
docker run -d --name "chatgpt-telegram-bot" --env-file ./.env n3d1117/chatgpt-telegram-bot:latest此时,TG下访问Bot就可以玩了
配置更新,服务自动重启
目前的版本是docker run container,环境变量对应的配置文件更新,容器是不会自更新的。因此需要解决配置更新-服务重新创建的问题。这里使用inotify-tools解决。这里以CentOS7为例
sudo yum -y install inotify-tools- 创建watch_env.sh文件
#!/bin/sh
while true; do
  inotifywait -e modify .env
  echo ".env file has been modified. Restarting the container..."
  docker stop chatgpt-telegram-bot
  docker rm chatgpt-telegram-bot
  docker run -d --name "chatgpt-telegram-bot" --env-file /root/chatgpt-telegram-bot/.env n3d1117/chatgpt-telegram-bot:latest
done
- 创建watch-env.service
sudo vi /etc/systemd/system/watch-env.service
服务配置如下
[Unit]
Description=Watch and restart Docker container on .env file changes

[Service]
Type=simple
ExecStart=/bin/bash /root/chatgpt-telegram-bot/watch_env.sh
Restart=always
User=root

[Install]
WantedBy=multi-user.target
- 服务自启动/运行
sudo systemctl daemon-reload

sudo systemctl enable watch-env.service

sudo systemctl start watch-env.service
GPT4
需要申请获取权限后,修改.env中OPENAI_MODEL=gpt-4
申请地址:https://openai.com/waitlist/gpt-4-api
写在最后
到此,个人bot就有了,虽然也付费,但相对算稳定。期待API-GPT4早点拿到资格,这样更香了。