前端tree shaking
单页应用带来更流畅的前端体验,同时也带来了一些麻烦,比如SEO,又比如日益严重的体积问题。当然办法总比困难多,tree shaking便是优化体积问题的办法之一
概念
tree shaking,它是什么
Tree shaking is a term commonly used in the JavaScript context for dead-code elimination. It relies on the static structure of ES2015 module syntax, i.e. import and export. The name and concept have been popularized by the ES2015 module bundler rollup.
The webpack 2 release came with built-in support for ES2015 modules (alias harmony modules) as well as unused module export detection. The new webpack 4 release expands on this capability with a way to provide hints to the compiler via the “sideEffects” package.json property to denote which files in your project are “pure” and therefore safe to prune if unused.
关键点
- tree shaking是个专业术语,最早由rollup提出。
- tree shaking是
DCE(Dead code elimination)的一个手段,比如我们利用eslint辅助检测return之后的无效代码处理也是一种手段 - tree shaking依赖E6的静态结构特性
import,export,so,commonJS无法做到tree shaking. - tree shaking的目的是为了消除无用代码(dead code)
辅助工具-webpack-bundle-analyzer
为了方便查看影响体积的具体模块,安装插件webpack-bundle-analyzer,当我们不断改进优化时,也方便看到是否起作用。
安装走起
package.json中增加脚本配置
1 | "build:analyzer": "node scripts/build.js analyzer", |
- analyzer为自定义属性
- 分析配置基于生产配置打包才有意义,毕竟体积的优化目的是面向生产打包
webpack构建脚本增加插件配置
webpack.config.prod.js
1 | const plugins = getPlugins(); |
注意
- 这里通过识别构建脚本是否传analyzer参数,从而确定是否开启分析。之所以这样做,我只希望本地启动来分析包大小。
- BundleAnalyzerPlugin插件默认是开启http服务来展示打包报告的,所以当执行
build:analyzer脚本,本地会启动一个Web服务,端口默认为8888。
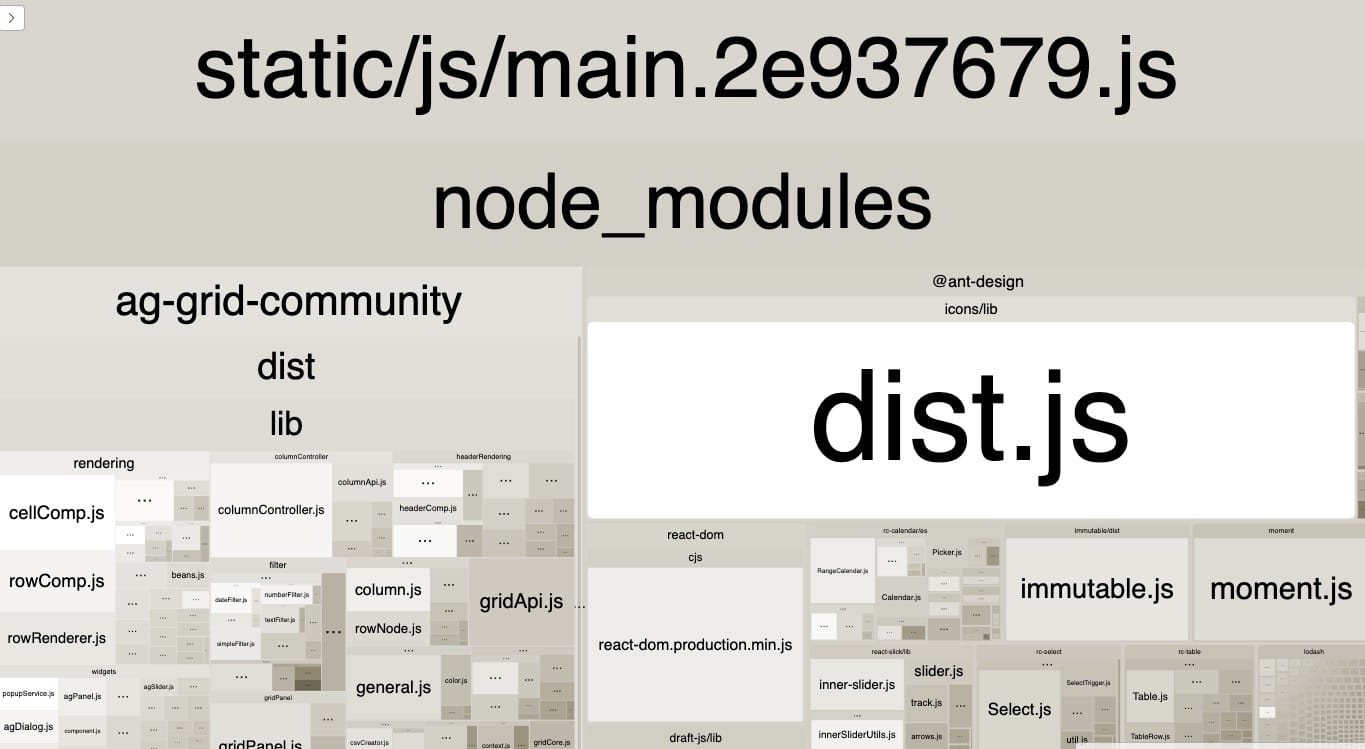
服务启动,访问 http://127.0.0.1:8888/,就会看到如下画面
举个例子
说明:下面会通过一个项目来说明tree shaking,项目本身是以create-react-app初始化的。
Tech Stack
1 |
|
贴出关键的包,围绕lodash这个典型的第三方类库及本身项目代码,我们来开始瘦身之旅。
注意,当我们进行tree shaking,针对的目标其实也就是本身项目中的代码和引用的第三方代码。所以这里我们分两块来做。
接下来我们通过一个例子,来实践下
tree shaking开启前
项目中代码
创建两个工具函数
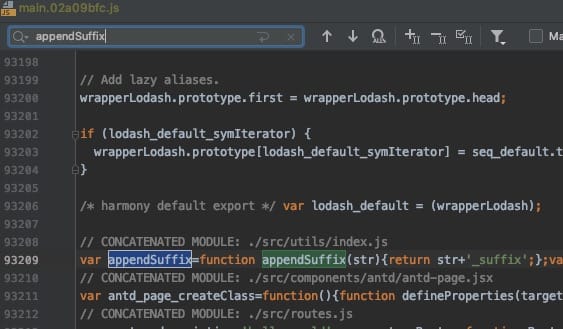
1 | export const appendSuffix = str => str + '_suffix'; |
假如整个Web中,我们只用到了appendPrefix,当我们正常打包,进入构建打包的JS文件中检索,会发现除了appendPrefix 之外,appendSuffix 也健在。。。so 这就是我们要干掉的dead code.
因为工具函数其实去除了dead code,体积上变化也是细微的,所以这部分就不宏观来看体积问题
第三方lodash
除了本身我们自己创建的函数,平时,我们还会到第三方工具包,比如lodash。
实际代码中,假如我们用到了其中的map函数,具体代码如下。
1 |
|
构建打包后,体积如下
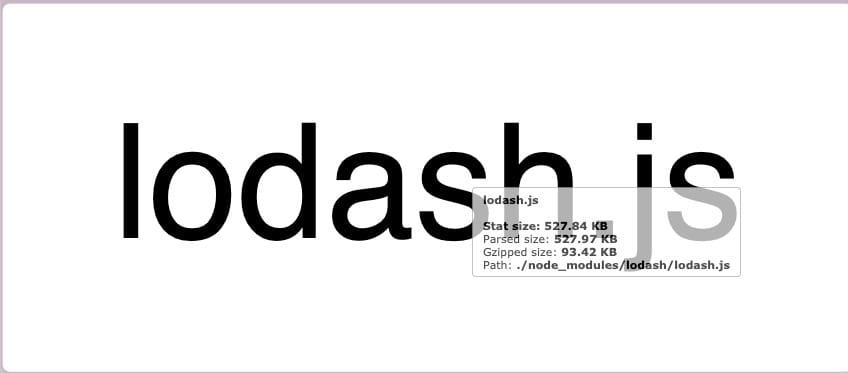
体积竟然高达528KB,也就是说上述的使用方式其实是将lodash完整的包打进去了。在打包输出JS中检索lodash的其它函数比如mergeWith,发现是可以找到的。

注意,整个WEB的体积这时是3.81MB[未压缩]
tree shaking配置
上面的体积惨状足以让我们意识到,问题有多大。大量的死代码被放在了最终的JS文件中,最最终让用户为此买单。作为一个专业的前端,这点不能忍。于是开始 摇!树!
项目中的dead code
webpack配置中我将模式设置为production
1 | module.exports = { |
当mode是production,默认会启用TerserPlugin插件,而该插件会删除没有用到的代码,比如appendSuffix。
修改后,我们重新打包,在打包后的文件中检索,_suffix 已经搜不到了,但是prefix还可以搜到
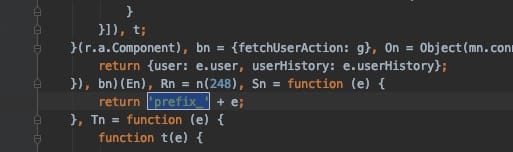
为什么这里没有按照工具函数名称去搜索,因为插件默认出了进行tree shaking,还对代码进行了混淆,函数名称改变了
因此我们有理由相信,当设置为生产模式,这些基本的死代码都可以被去除掉。
lodash中的dead code
刚才的设置,只是可以剔除掉简单的一些代码,回头看整体体积,基本没变,为什么?因为lodash大哥还在。so,我们要继续革lodash的命。
设置
lodash包本身的导出是commonJS,这个是无法做tree shaking的,当然有其它的办法做类似tree shaking的处理。
这里,我们围绕tree shaking来解决,so要安装es版的lodash,so继续下面的。
安装lodash-es
1
2yarn remove lodash
yarn add lodash-es修改导入方式
1
2import {map} from 'lodash-es';
lodash-es导出为es modules,所以我们利用这个进行按需导入,打包时候就会将不需要的模块删除。
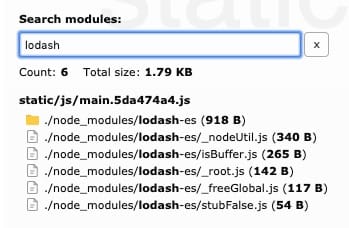
重新run app,发现lodash体积明显缩小
如上我们解决了项目本身和第三方lodash的体积问题,顺便,再说说antd,毕竟这个也很常用。
antd体积问题
项目中经常使用antd UI组件库,但并不是每个UI组件都会用到,那么这个体积问题如何进行解决呢。官方给了方案
babel-plugin-import
1
yarn add babel-plugin-import
babel plugin配置
1
2
3
4
5
6
7
8
9
10"plugins": [
[
"import",
{
"libraryName": "antd",
"libraryDirectory": "es",
"style": "css"
}
]
]导入方式改写
1
import {Button, Table} from 'antd';
注意
因为babel插件的配置,组件按需加载的同时,对应模块样式也进行了按需加载,所以不需要全局加载完整的antd样式,或者手动加在模块组件样式。
假如不安装该插件,也可以进行tree shaking,即
1
2
3
4import Button from 'antd/es/button';
import Table from 'antd/es/table';
import 'antd/es/button/style/css';
import 'antd/es/table/style/css';
对比如上,哪个更为简单呢,仁者见仁的事,个人喜欢上面的插件方案,也就是antd官方推荐的方案。其中一个原因是不能导入多个组件。
副作用(Side Effect)
副作用是个术语,如果玩过redux-saga应该对此很熟悉。
如果代码有副作用,tree shaking就无法对该代码生效。也就是说tree shaking后的代码,只保留了有副作用的代码,对于其它无副作用的,未被使用的代码,均被删除。
查看lodash的包文件,我们可以发现lodash是没有副作用的。所以上面的例子中我们才进行tree shaking
包含副作用的代码不能tree shaking?
是的。
写在最后
以上是我在实际项目中的困惑,so,多翻查看,才有这么点产出。权当抛砖引玉了。
参考资料
- webpack official doc
- 你的Tree-Shaking并没什么卵用
- The Correct Way to Import Lodash Libraries
- Reduce JavaScript Payloads with Tree Shaking
- 配置Tree Shaking来减少JavaScript的打包体积
- es6-modules-in-depth
- Tree-shaking in real world: what could go wrong?
- 使用 Tree Shaking
- Webpack Deep Scope Analysis Plugin
- GitHub Issue – Tree Shaking?
- tree-shaking不完全指南
- tree-shaking
- Dead Code Elimination